We had settled on the game size and that it would be a Maelstrom game, so I decided to be cheeky and brought two very different lists - I would have Taher roll to see which list I field. One was a Nidzilla type list comprised almost exclusively of monstrous creatures, while the other was built around an Endless Swarm formation from the Leviathan supplement. He rolled a 4 and that meant I would be fielding my swarm list. I was excited to play this sort of list since it was my first time fielding so many little gribblies after building my Swarm box a couple of weeks ago!
 |
| The battlefield set-up is complete. We went for a relatively sparse scattering of buildings but made sure to include a line-of-sight blocking structure in the center of the battlefield. |
The Armies
 |
| The Imperial Fist successor chapter is ready for battle. |
Taher's Imperial Fist force was a single CAD that was built around a high infantry model count and the use of dedicated transports across the board. He would deploy only his Tactical Squads, embarked within their Rhinos. The heavy hitting combo of Stormraven, Dreadnought, and Command Squad with Chapter Master would arrive (hopefully) on turn two and lay waste to their target(s).
It looks like a resilient list capable of fighting for map control with 45 infantry and 5 vehicles to protect them.
Imperial Fists - Combined Arms Detachment
Chapter Master (Artificer Armour, Storm Shield)
5x Command Squad (Apothecary)
1x Dreadnought (TL Lascannon, Multi-Melta, Power Fist, Storm Bolter)
10x Sternguard Veteran Squad (2x Heavy Flamer)
Dedicated Transport - Drop Pod (Deathwind Launcher)
10x Tactical Squad (Missile Launcher)
Dedicated Transport - Rhino
10x Tactical Squad (Missile Launcher)
Dedicated Transport - Rhino
10x Tactical Squad (Missile Launcher)
Dedicated Transport - Rhino
Stormraven Gunship (4 Stormstrike Missiles, TL Lascannon, TL Multi-Melta, 2x Hurricane Bolters)
Tyranids (CAD + Formation + Allied Detachment)
My list was built around an Endless Swarm formation at the core. The idea was to throw waves and waves of bodies at the Space Marines, overwhelming him with sheer numbers while the hard-hitting MCs could focus on priority targets. The Malanthropes were there to provide shrouded to as many units as they could, as well as for some extra synapse redundancy.
The Trygon Prime's function was to burrow in and create a hole through which returning troops from the endless swarm could re-enter battle to have an immediate impact. The Trygon Prime's special rule allows for troop models arriving from reserves to essentially enter via scatter-less deep strike in the area which he used to initially enter the game. This synergizes very nicely with the endless swarm formation, since their special rule allows them to roll a die after a unit is destroyed - on a 4+ that unit would simply go into ongoing reserves and re-enter the game automatically on the next turn. Instead of having to place them on my board edge where there may or may not be synapse available, I would be able to have them pop out of the hole the Trygon created and get right back into the fray.
The Tyranids enjoyed an almost 2-1 numbers advantage with 82 infantry models and 3 Monstrous Creatures to provide the heavy hitting where it would be needed.
 |
| The Tyranid force has an intimidating model count as well as a few hard-hitting monstrous creatures. All in all 15 distinct scoring units, 6 of which would be eligible to re-enter play on a 4+ the turn after which they are destroyed. |
Combined Arms Detachment
Hive Tyrant (Wings, 2x TL Devourers w/ Brainleech worms) - Dominion, Paroxysm, Catalyst
1x Malanthrope
1x Malanthrope
2x Zoanthropes - Dominion, Warp Blast, Psychic Scream
1x Mucolid Spore
1x Mucolid Spore
Hive Crone (no upgrades)
Trygon Prime (no upgrades)
Endless Swarm Formation
3x Tyranid Warriors (3x Rending Claws, 1x Barbed Strangler)
10x Hormagaunts
10x Hormagaunts
10x Hormagaunts
10x Termagants
10x Termagants
10x Termagants
Allied Detachment - Genestealer Cult
Patriarch Ghosar - Dominate, Mental Fortitude
12x Acolyte Hybrids
The Mission
We rolled the Spoils of War mission from the BRB. There are 6 objectives placed on the battlefield. Each player draws cards until they have 3 in their hand at the start of each turn. Unlike other scenarios, you are not permitted to discard mission cards titled "Secure Objective X", and can indeed score objective cards held by either yourself or your opponent.
 |
| The Imperial Statuary from what would be the Imperial Fist deployment zone. It watches over the battlefield willing the Astartes to victory. |
Due to the mission special rules, there would be a greater emphasis on board control and holding objectives even when you don't necessarily have a card to score that objective at the moment. This jived well with my swarmy list since I had an abundance of units that could hold objectives, though it also benefited Taher's army since he had a large number of units and transports that could divide and conquer the battlefield - he also held an advantage in that he was running a CAD with objective secured troops choices whereas all of my troops were either from my endless swarm formation (no obsec), or mucolid spores (non-scoring units).
The Battlefield & Deployment
Lately I have been pushing for using a bit less terrain - We were coming off a long kill team campaign and had gotten into the habit of making beautiful terrain-heavy maps, however I feel that this was disturbing the balance of the game a bit and particularly favouring my Tyranids due to their plethora of ways to abuse cover (shrouded, being able to approach into assault range without being exposed to danger, etc.).
 |
| Objectives numbered 1 through 6. Each deployment zone had 2 easy to grab objectives while #'s 5 and 6 in the center would sure to be hotly contested. (#4 is in the small building on the far side). This is the view from the Tyranid deployment zone, as the Imperial Fists chose to deploy along the far table edge. |
 |
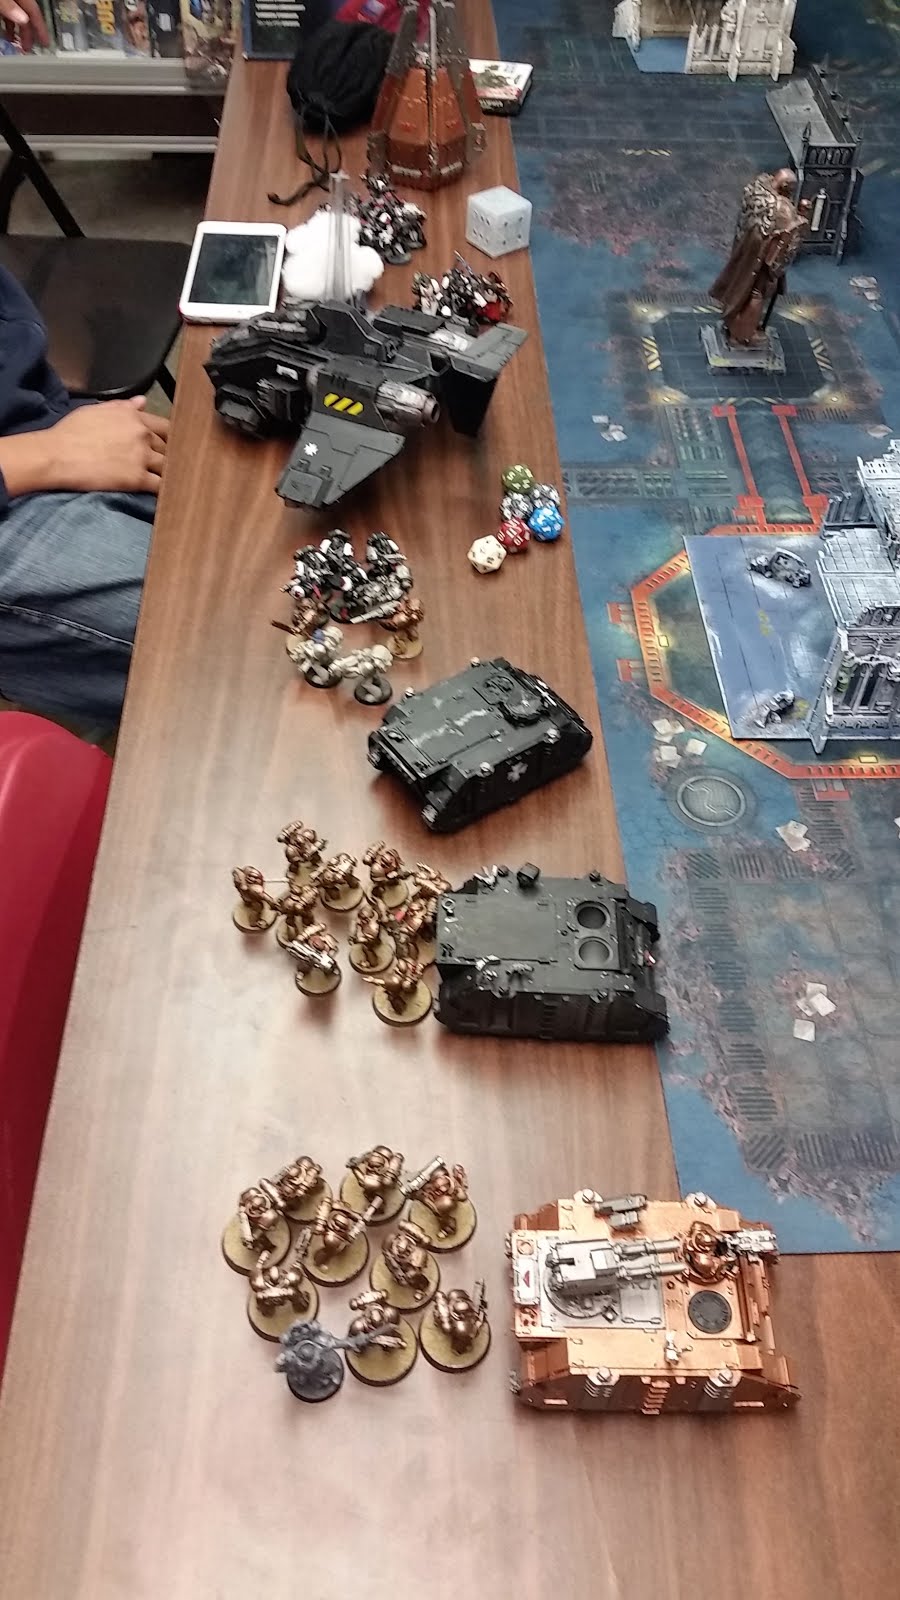
| The full Space Marine deployment. 3 Tactical Squads embarked in their dedicated Rhinos. |
 |
| Tyranid deployment. Wave after wave of Tyranids set to charge forward. Each blob has synapse from 2 sources and the Malanthropes are giving everything Shrouded except for the Patriarch + Acolytes. |
It was a Dawn of War style deployment, and Taher won the roll-off to choose table sides. He also chose to deploy and to go first.
The entirety of the Imperial Fist force would be deployed within transport vehicles. All three ten-man Tactical Squads started the game embarked in their Rhinos. The remainder of the Space Marine force was held in deep strike reserves; the Sternguard would be entering via drop-pod on turn one, while the Command Squad, joined by the Chapter Master, was riding in the Stormraven Gunship along with the Dreadnought.
My army didn't have too much in terms of deployment shenanigans. It was mostly a straight up standard deployment. The Patriarch joined up with the Acolyte Hybrids to infiltrate forward closer to the center of the battlefield, while the Trygon Prime and two Mucolid Spores would be held in deep strike reserves.
I attempted to seize the initiative but was unsuccessful - it was time for Imperial Fists, Turn One.
Turn One
Imperial Fists Objectives: Secure Objective 4, Hold the Line, Hungry for Glory
The set of objectives was relatively kind to the Space Marines. Objective 4 would be an easy grab as it was already held - within their deployment zone. Hold the Line too would be an easy task - they would just hold back with at least 3 Squads / Rhinos - a sound tactic anyway given the waves of Tyranids down their sights.
Unfortunately Hungry for Glory would be a throw-away at the end of the turn since the only characters that could be challenged within the Tyranid force were Patriarch Ghosar and the Hive Tyrant - not a desirable proposition for the Marines.
 |
| The Sternguard Veterans' Drop Pod |
The Sternguard Veterans arrived via Drop Pod on turn one. They chose an extremely aggressive position, hoping to take control of the center by landing on objective #6. They disembarked and put all of their AP4 Kraken Rounds into the Hive Crone, which was still gliding, and would be vulnerable with its 4+ armour save. The hail of fire caused the Crone to Jink, otherwise it would likely be shot down. They managed an impressive 8 wounds against the Hive Crone, however the 4+ Jink save was boosted to a 2+ thanks to the Malanthrope's Shrouded bubble, and the Tyranid flyer was able to evade the incoming fire - no unsaved wounds were inflicted!
 |
| These Sternguard Veterans know no fear, dropping right into the thick of things. |
Two of the Imperial Fist squads disembarked from their Rhinos and entered the ruins housing objectives #2 and 4 - preparing to dig in and hold the line. The third Rhino sped toward the Tyranids, moving at Cruising Speed to nab Objective #5, hopefully denying it from the enemy force.
At the end of their first turn the Imperial Fists had done little damage, but they had fanned out and controlled 4 objectives, meaning that the Tyranids would have to work for their map control. The Space Marines were off to an early 2-0 lead.
Tyranid Objectives: Hold the Line, No Prisoners, Overwhelming Firepower
 |
| The Tyranid force begins its advance. The Sternguard and their Drop Pod are caught in a precarious position. |
 |
| The Hive Crone one-shots the Drop Pod, taking the threat of its Deathwind Launchers out of play. |
In the movement phase all of the gribblies piled forward - bounding over the Promethium Pipeline that was in their way. Two units of Termagants and the unit of Warriors hung back to ensure that Hold the Line would be scored.
The Hive Tyrant and Crone both took to the skies. The Tyrant flew on top of the central ruins structure, securing ample vision of the battlefield as well as a cover save. The Hive Crone, having jinked earlier this turn, would not be able to fire its Drool Cannon, so it swooped directly forward in order to hit the Drop Pod with a S8 AP2 Raking Strike.
The Hive Crone's Raking Strike was resolved at the end of the movement phase. With a roll of 5 to pen and 6 on the vehicle damage result table, the Drop Pod was instantly exploded by the Tyranid flyer! First Blood was secured for the Hive Fleet Behemoth Tyranids, as was at least one point for No Prisoners.
In the Psychic Phase, the Hive Tyrant targeted the Sternguard with Paroxysm. The ability went off and they were left at a paltry WS/BS 1 until the next Tyranid psychic phase! The Tyrant was also able to get off Catalyst, giving himself as well as the Patriarch and his Acolytes Feel No Pain. The Tyrant did suffer a Perils of the Warp result and lost a wound, however he passed his grounding test and still had 3 wounds remaining.
The shooting phase was underway, and most of the Tyranid force elected to run forward and close the gap. Shooting from Termagants felled a couple of the Sternguard Veterans, while the Hive Tyrant was able to destroy the tactical squad's Rhino, forcing them from the safety of their Dedicated Transport and leaving them vulnerable to charges. This scored Overwhelming Firepower for the Tyranids.
A unit of Hormagaunts as well as the Malanthrope were able to make a charge into the Sternguard Veterans who were now caught in the open. The melee however resulted in a draw, with just one unsaved wound per side.
At the end of turn one, the Tyranids had scored a point for all 3 of their objective cards, as well as an additional point for First Blood, going into turn two with a 4-2 lead.
Turn Two
Imperial Fists Objectives: Secure Objective 2, Secure Objective 4, Domination
While objectives 2 and 4 would be easy takes for the Space Marines (both were within their own deployment zone), Domination was an unfortunate draw. I'm really not a fan of this card - holding all 6 objectives is quite a tall order.
The Stormraven Gunship and its precious cargo entered play at the start of turn two. They flew in to bolster the Fists' left flank. The Dreadnought was dropped off, scattering a bit further from the action than he wanted, as did the Chapter Master's Command Squad.
On the other flank, two empty Rhinos sped into the Tyranid ranks to create a diversion and halt their advance. Their respective Tactical squads were holed up within ruins holding Objectives 2 and 4.
After the Chapter Master disembarked from the Stormraven, he called in an Orbital Strike right into the center of mass of the Tyranids' right flank. The scatter was unfavourable however and the blast only caught two Hormagaunts who miraculously were both able to avoid being wounded by the S10 AP1 ignores cover blast.
The Stormraven set its sights on the Tyranid Warlord, peppering him with fire from a Lascannon, Multi-Melta, and Missiles. The Tyrant was able to evade most of the shooting, but did take an unsaved wound, leaving him at 2 and forcing yet another grounding test at the end of the phase (which he would go on to pass).
The 2 Tactical Squads at the back lines were able to snipe a few Hormagaunts from range, while the Tactical Squad that had been forced to disembark from their wrecked Rhino decimated the Patariarch's Acolyte unit, leaving them at less than half strength.
In the assault phase, there were no new assaults to declare. The Malanthrope and Hormagaunts continued their ongoing melee against the Sternguard Veterans. The Tyranids continued to exchange equal number of wounds with the Sternguard, however the trade of 1 Sternguard for 1 Hormagaunt heavily favoured the Tyranids.
At the end of their turn two, the Imperial Fists had scored 2 additional points to tie the score at 4's.
Tyranid Objectives: Secure Objective 6, Secure Objective 1, Big Game Hunter
Objective 1 was already held by Termagants that had hung back within the Tyranid deployment zone, while the Tyranids would have to get rid of the Sternguard to score Objective 6 this turn. It looked like Big Game Hunter was a lock since there were two squishy Rhinos right in the thick of things. Surely at least one could be taken out to score a point for Hive Fleet Behemoth.
Before any of that however, I had to roll for reserves. Both Mucolids as well as the Trygon Prime would be entering play. I wanted the Trygon to enter in the most central location possible since the hole he creates when he enters play could be used by gaunts returning to action using the Endless Swarm formation's special rule. He rolled a Hit! on the scatter die and came in right behind the two Rhinos.
I was really hoping to be able to get a Vector strike off against the Stormraven with the Hive Crone, but my opponent had smartly positioned his flyer so that was impossible. Looking at his movement options for next turn, I decided to take a risk and go into Gliding mode so that I could get into a position from which I would be able to Vector Strike the Stormraven next turn no matter where it went.
The Hive Tyrant stayed in Swooping mode however, and flew toward the Space Marines' Flyer.
The rest of the Tyranid horde kept advancing forward, slowly taking over the map in a sea of chitin and talons.
The Zoanthropes were now within range to support the Malanthrope and Hormagaunts' combat with a Psychic Scream - a nova power that can hit units locked in combat. Two of the Sternguard were vanquished, leaving just three to fight against the incoming waves.
In the Shooting Phase, the Hive Crone put two if its Tentaclids to use against the Stormraven. Two hits from the Haywire missiles scored - and I rolled boxcars for penetration! The Stormraven failed both of its Jink saves, and a further 6 meant that the Zooming Flyer would immediately Crash and Burn!!! To make matters worse, this freed up the Hive Tyrant to shoot at the AV12 Dreadnought - the Tyrant was able to score enough glances against the Walker to wreck it as well! Two significant losses dealt to the Imperial Fists meant a comeback would be a steep uphill battle for them.
The Patriarch and his Acolytes were now able to charge, and they took minimal casualties to overwatch before completely destroying the remaining Tactical Marines that stood in their way.
Support from a charging Termagant Brood was simply too much for the Sternguard - they were slain to the last man in the assault phase. The smaller Tyranids consolidated forward while the Malanthrope stayed back to consume their bodies. Now the entire Tyranid flank would have Preferred Enemy as a result of the Malanthrope's Prey Adaptation special rule! Objective 6 was secured and the odds seemed heavily stacked against the Space Marines.
At the end of turn two the Tyranids had scored 3 more points to take a 7-4 lead.
Conclusion
With only 3 units left and no way to deal with the Tyranid flyers and sheer numbers of advancing bodies, the Chapter Master ordered an evacuation and heavy orbital bombardment into the area. The Tyranids were victorious with a 7-4 victory.
This was a decisive win for the Tyranids, but in truth it could have gone quite differently had I not been as lucky on some rolls. I think there were a couple of missteps on the Imperial Fists side - his Sternguard were sort of left out to dry with that aggressive Drop Pod location. The two tactical squads on that same flank were a bit too far away to provide effective fire support to the Pod and Sternguard.
But really I just got extremely lucky against the Space Marine vehicles, managing to one-shot the Drop Pod, Stormraven, and Dreadnought. I'm sure the game would have been a lot closer if those key vehicles had survived to put more fire into my Flyers and Swarms.
I was very pleased with the performance of the swarm list - the Malanthropes were absolutely instrumental in both providing synapse redundancy as well as what would amount to army-wide Shrouded and Preferred Enemy with some good positioning.
The Hive Crone's Raking Strike was resolved at the end of the movement phase. With a roll of 5 to pen and 6 on the vehicle damage result table, the Drop Pod was instantly exploded by the Tyranid flyer! First Blood was secured for the Hive Fleet Behemoth Tyranids, as was at least one point for No Prisoners.
 |
| End of Tyranid movement phase - the swarms are quickly closing ground against the Imperial Fist force. |
The shooting phase was underway, and most of the Tyranid force elected to run forward and close the gap. Shooting from Termagants felled a couple of the Sternguard Veterans, while the Hive Tyrant was able to destroy the tactical squad's Rhino, forcing them from the safety of their Dedicated Transport and leaving them vulnerable to charges. This scored Overwhelming Firepower for the Tyranids.
A unit of Hormagaunts as well as the Malanthrope were able to make a charge into the Sternguard Veterans who were now caught in the open. The melee however resulted in a draw, with just one unsaved wound per side.
At the end of turn one, the Tyranids had scored a point for all 3 of their objective cards, as well as an additional point for First Blood, going into turn two with a 4-2 lead.
Turn Two
Imperial Fists Objectives: Secure Objective 2, Secure Objective 4, Domination
While objectives 2 and 4 would be easy takes for the Space Marines (both were within their own deployment zone), Domination was an unfortunate draw. I'm really not a fan of this card - holding all 6 objectives is quite a tall order.
 |
| Stormraven arrives with both the Hive Crone and Tyrant in its sights. The Dreadnought and Chapter Master with his Command Squad would disembark from the Zooming Flyer to support their Tactical Squad that had just hopped out of their wrecked Rhino (center). |
 |
| An ongoing combat between Hormagaunts and the Malanthrope rages to the right as the two Rhinos are set to Tank Shock the advancing Hormagaunts. |
After the Chapter Master disembarked from the Stormraven, he called in an Orbital Strike right into the center of mass of the Tyranids' right flank. The scatter was unfavourable however and the blast only caught two Hormagaunts who miraculously were both able to avoid being wounded by the S10 AP1 ignores cover blast.
The Stormraven set its sights on the Tyranid Warlord, peppering him with fire from a Lascannon, Multi-Melta, and Missiles. The Tyrant was able to evade most of the shooting, but did take an unsaved wound, leaving him at 2 and forcing yet another grounding test at the end of the phase (which he would go on to pass).
The 2 Tactical Squads at the back lines were able to snipe a few Hormagaunts from range, while the Tactical Squad that had been forced to disembark from their wrecked Rhino decimated the Patariarch's Acolyte unit, leaving them at less than half strength.
In the assault phase, there were no new assaults to declare. The Malanthrope and Hormagaunts continued their ongoing melee against the Sternguard Veterans. The Tyranids continued to exchange equal number of wounds with the Sternguard, however the trade of 1 Sternguard for 1 Hormagaunt heavily favoured the Tyranids.
At the end of their turn two, the Imperial Fists had scored 2 additional points to tie the score at 4's.
Tyranid Objectives: Secure Objective 6, Secure Objective 1, Big Game Hunter
Objective 1 was already held by Termagants that had hung back within the Tyranid deployment zone, while the Tyranids would have to get rid of the Sternguard to score Objective 6 this turn. It looked like Big Game Hunter was a lock since there were two squishy Rhinos right in the thick of things. Surely at least one could be taken out to score a point for Hive Fleet Behemoth.
 |
| Trygon Prime has entered play. He'll be able to plug some S5 shots into the rear armour of the Rhinos this turn, and provide a nice forward location for further reinforcements. |
I was really hoping to be able to get a Vector strike off against the Stormraven with the Hive Crone, but my opponent had smartly positioned his flyer so that was impossible. Looking at his movement options for next turn, I decided to take a risk and go into Gliding mode so that I could get into a position from which I would be able to Vector Strike the Stormraven next turn no matter where it went.
The Hive Tyrant stayed in Swooping mode however, and flew toward the Space Marines' Flyer.
The rest of the Tyranid horde kept advancing forward, slowly taking over the map in a sea of chitin and talons.
 |
| The Sternguard Veterans fight against insurmountable odds. Two tactical squads provide fire support, just out of view from the top edge of the shot, however there are simply more bodies than bullets. |
 |
| The Stormraven has crashed and the Hive Tyrant has destroyed the Dreadnought. |
 |
| Wave upon wave of xenos lurch forward against the Imperial Fists' back lines. |
The Patriarch and his Acolytes were now able to charge, and they took minimal casualties to overwatch before completely destroying the remaining Tactical Marines that stood in their way.
Support from a charging Termagant Brood was simply too much for the Sternguard - they were slain to the last man in the assault phase. The smaller Tyranids consolidated forward while the Malanthrope stayed back to consume their bodies. Now the entire Tyranid flank would have Preferred Enemy as a result of the Malanthrope's Prey Adaptation special rule! Objective 6 was secured and the odds seemed heavily stacked against the Space Marines.
 |
| The Chapter Master and his Command Squad survive the crash of their Stormraven, but are staring down seemingly endless waves of Tyranids. |
 |
| Both flanks have completely crumbled for the Space Marines. Only two Tactical Squads and the Command Squad are left to see turn three. |
Conclusion
With only 3 units left and no way to deal with the Tyranid flyers and sheer numbers of advancing bodies, the Chapter Master ordered an evacuation and heavy orbital bombardment into the area. The Tyranids were victorious with a 7-4 victory.
This was a decisive win for the Tyranids, but in truth it could have gone quite differently had I not been as lucky on some rolls. I think there were a couple of missteps on the Imperial Fists side - his Sternguard were sort of left out to dry with that aggressive Drop Pod location. The two tactical squads on that same flank were a bit too far away to provide effective fire support to the Pod and Sternguard.
 |
| The conclusion of the game reveals a board overrun with Tyranids. The Imperium will have no choice but to order an Exterminatus. |
I was very pleased with the performance of the swarm list - the Malanthropes were absolutely instrumental in both providing synapse redundancy as well as what would amount to army-wide Shrouded and Preferred Enemy with some good positioning.
Nice write up!
ReplyDelete